The teams I manage at work pride themselves on moving quickly. We release features, adjust UI, and run experiments at a rate where it is difficult to follow everything which is going on. I see one of my responsibilities as a manager to keep up this pace of execution, but in a way which holds a high bar for quality and allows for feedback from stakeholders who aren’t following every design discussion or code review.
We had a problem of the sort where an engineer would make some kind of change and then later on get asked “why did you turn this on?”, “why didn’t you tell X?”, “did you consider A, B, C?”. This was adding uncertainty to the development process - engineers would be uneasy about rolling changes and felt pressure to get buy-in from every stakeholder before shipping even small modifications to the software.
I wanted my team to feel safe following a product development process where they wouldn’t get second guessed or called out if they did things the agreed-upon way. Using my favorite productivity tool prototyping platform (Google Apps), I created a form which would handle collecting the details of planned changes, format things nicely, and notify all appropriate stakeholders. We have an agreement with the team now that engineers are “covered” making changes as long as they fill out the form as soon as possible during the development process. If an engineer uses the form, ships a change, and then someone has a problem with how the feature was shipped or communicated, then I intervene and walk the stakeholder through our tracking process. This has been a great step toward making engineers feel more empowered to ship changes, giving stakeholders a concise summary of upcoming changes, and has the side effect of creating a clear log of everything our teams are contributing.
I’ve gotten some interest in this internally from other teams, and I think it’s a generally useful tool for any team of software engineers. I’m going to walk through how it works and was built, with the hopes that you may find something like this useful in your development process.
First, the structure of the form is really easy to set up in Google Forms. I’ll use the following sets of questions for this example:
- Audience of the change?
- Developer facing (changes to the API)
- User facing (any other visible change, e.g. emails)
- Internal only change (no user impact, e.g. a team process change)
- Timeline of the change?
- Live (reporting retroactively)
- Imminent (turning on today)
- Soon (turning on in the next few days)
- Testing (our first beta user was signed up)
- Later (planning stage, looking for feedback)
- Summary
- Description

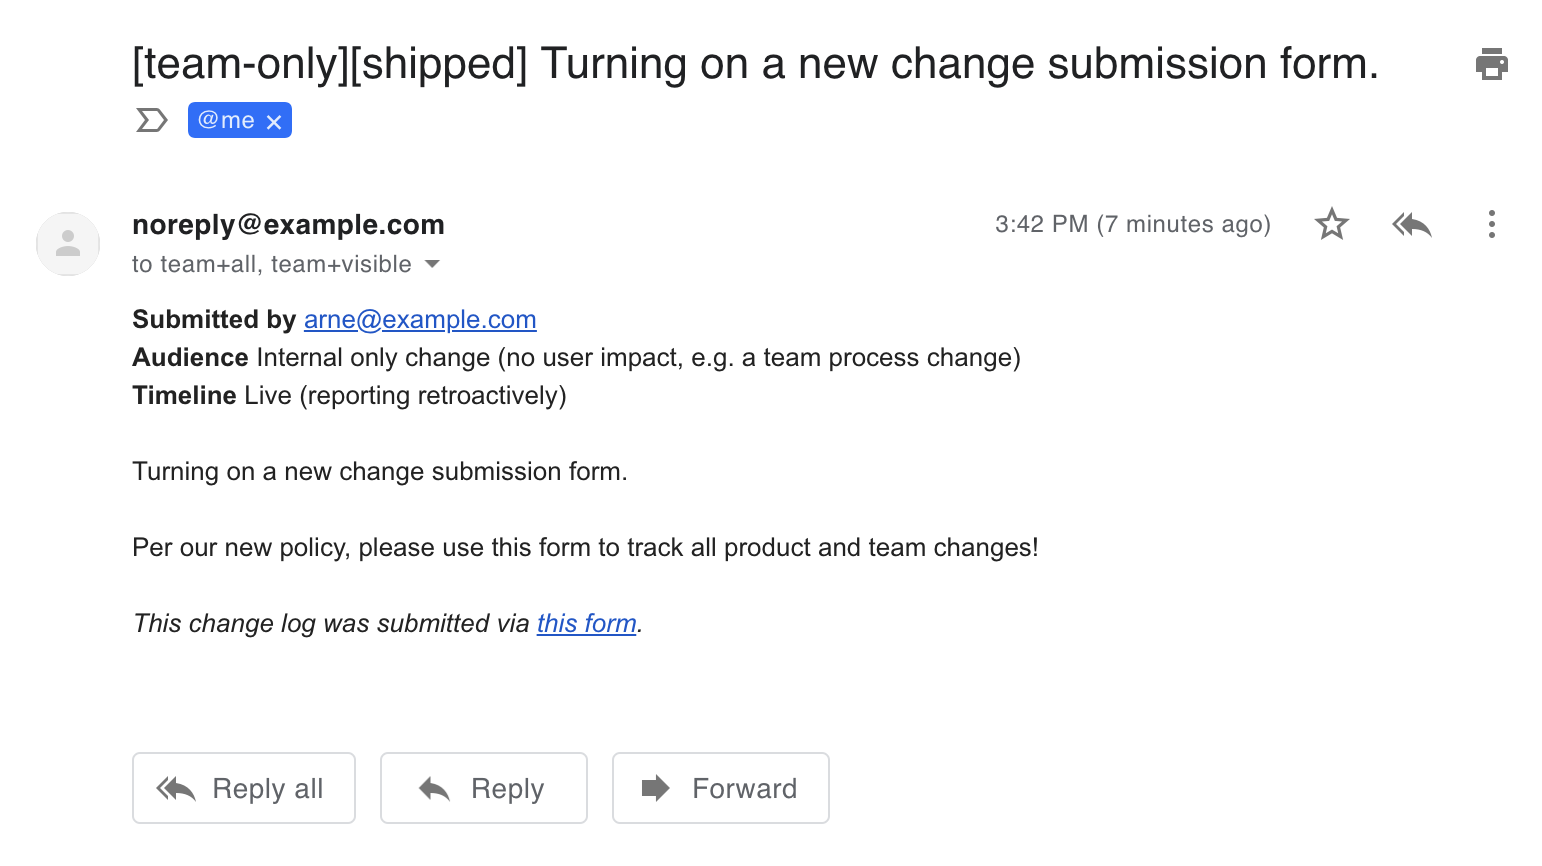
The goal is to email a nicely formatted message whenever the form is submitted. The audience of the email should also be configurable depending on which value is selected for the “Audience of the change?” question. Some stakeholder teams want to know everything, others only want more visible or developer-facing changes.
Setting up this form is easy:
- Create a Google Form and configure the questions as shown above.
- Set the form to collect email addresses.
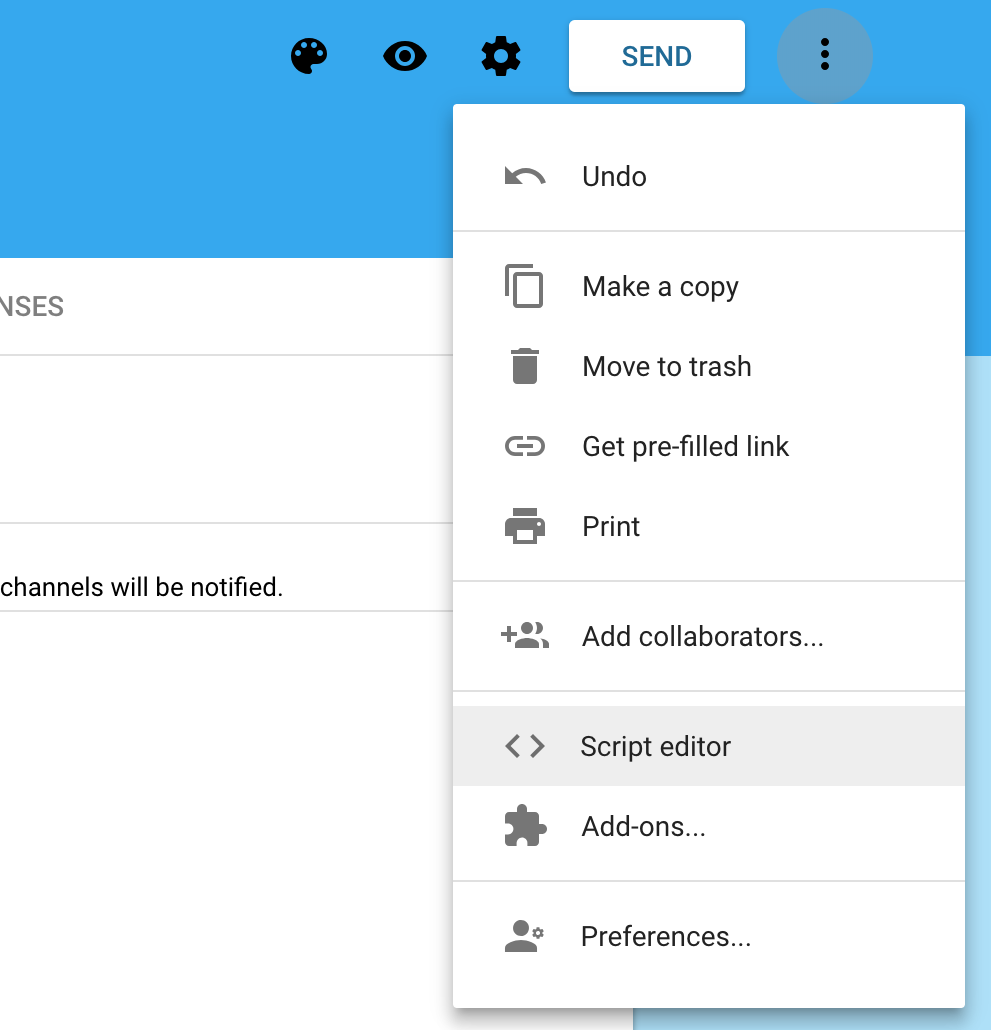
- Open up the Script Editor for the form.
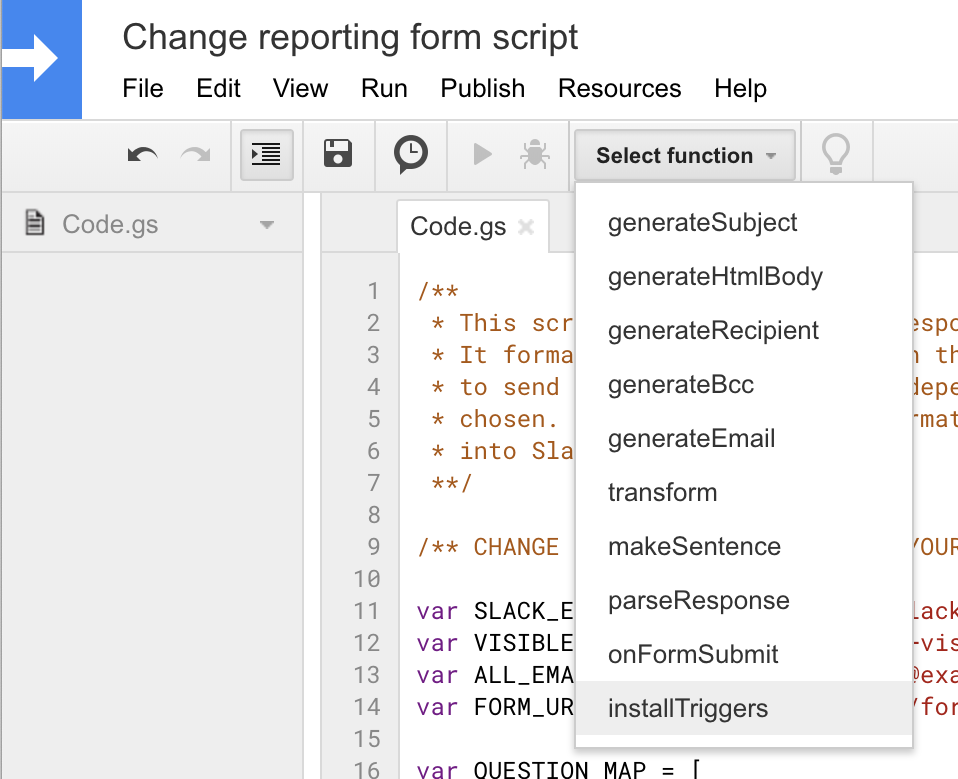
- Paste the contents of this script into the editor, making changes where noted.
- Run the
installTriggersfunction in the editor.
Then form submissions will be sent to the configured address(es). From there
you pipe the emails into Slack, mailing lists, whatever. There are a couple of
key components to the script. The first is the ability to run in response to a
form submission in the first place. I have a standard pattern for my Apps
Scripts where I do all of this setup in a function called installTriggers.
This needs to be run once per document / form / spreadsheet in order to set up
the right callbacks. I tend to do that early on in development and then never
again (unless I need to change the triggers for some reason).
function installTriggers() {
  const form = FormApp.getActiveForm();
  ScriptApp.newTrigger('onFormSubmit')
    .forForm(form)
    .onFormSubmit()
    .create();
};
Unsurprisingly, the code above will call a function named onFormSubmit every
time the form is submitted. There’s UI to set up triggers too, but I like
having everything contained in one script so that I don’t have to remember
which trigger goes to which function. The onFormSubmit function is the
main program logic. It runs through each form response (because this is run
once per submission) and sends a formatted email, deleting the response so that
they don’t build up in the form (if you link the form with a spreadsheet it
will not delete rows from the spreadsheet).
function onFormSubmit() {
  const form = FormApp.getActiveForm();
  const formResponses = form.getResponses();
  for (var i = 0; i < formResponses.length; i++) {
    var response = formResponses[i];
    var responseId = response.getId();

    var emailData = parseResponse(
      response.getRespondentEmail(),
      response.getItemResponses());

    var email = generateEmail(emailData);
    MailApp.sendEmail(email);

    form.deleteResponse(responseId);
  }
};
This function formats the data from the input form, generates templates for the
email, and then calls MailApp.sendEmail, part of the standard Apps Script
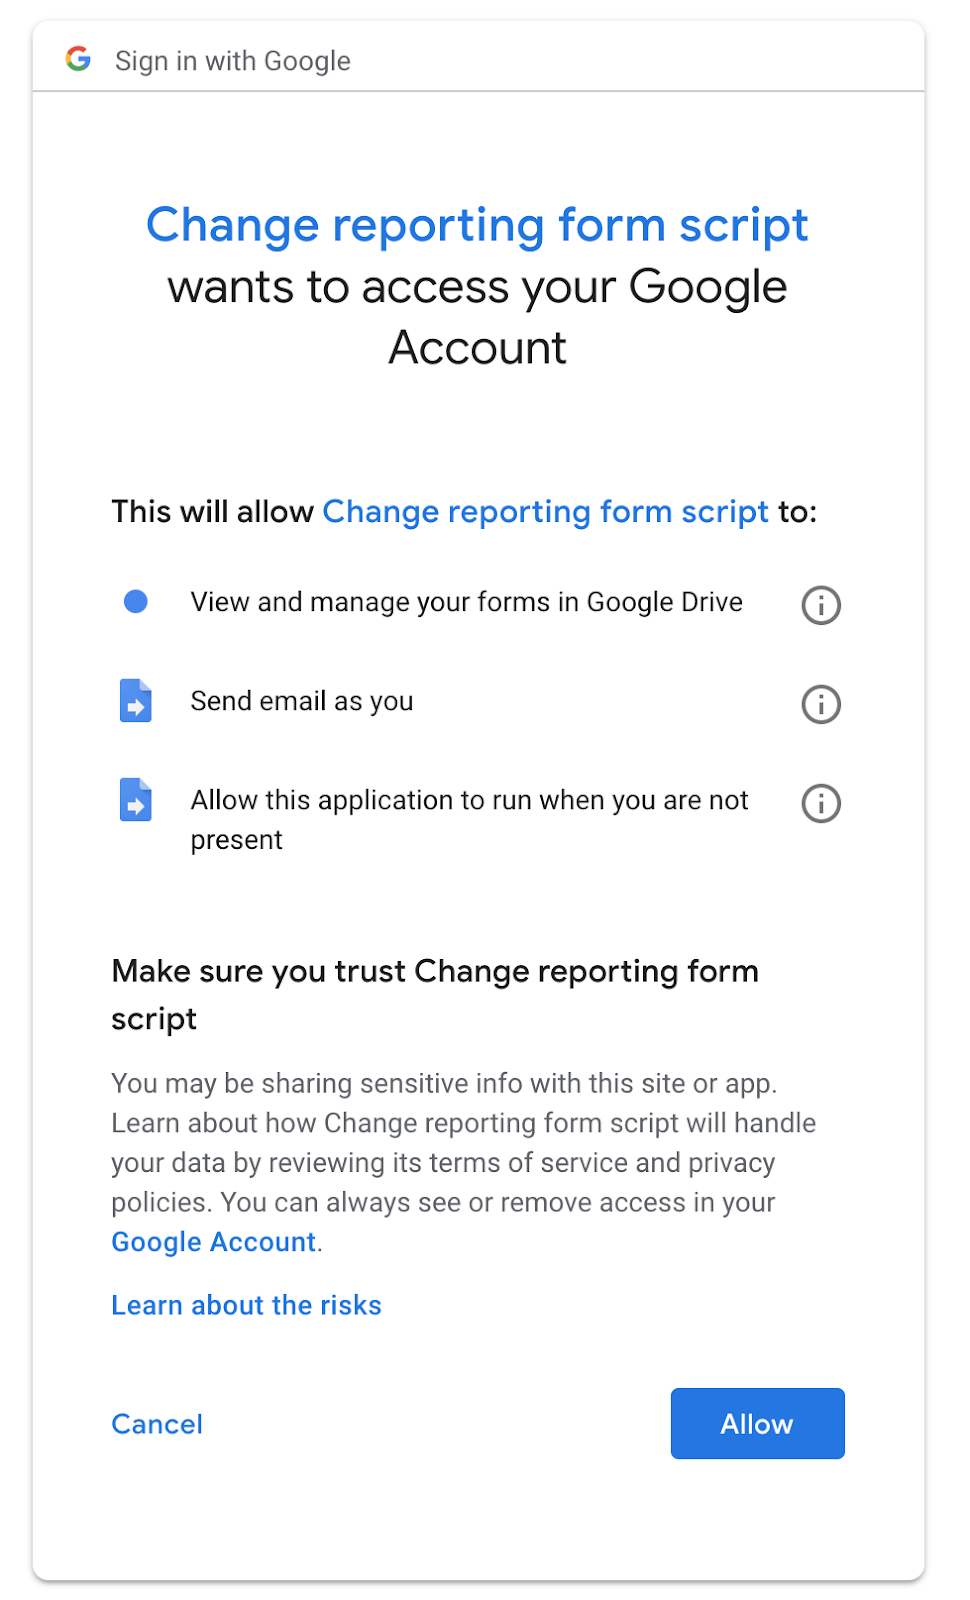
library. Something to keep an eye out for is that once you
reference this function in your app, you’ll be prompted to grant permission to
send email when it runs. I’ll execute installTriggers when I add a call
to sendEmail to make sure I grant explicit email permission.
The data passed to MailApp.sendEmail is a set of key/value pairs (see the
function documentation for a list). I have a set of helper methods which
generate this from the form submission:
function generateEmail(data) {
  return {
    'to': generateRecipient(data),
    'bcc': generateBcc(data),
    'replyTo': data['submitter'],
    'name': data['submitter'],
    'noReply': true, // This only works with G Suite accounts.
    'subject': generateSubject(data),
    'htmlBody': generateHtmlBody(data),
  };
};
Overall, it’s pretty easy to send email from an Apps Script. I’ve relied on this pattern a lot for various prototypes and lightweight utilities.
The bulk of the configuration of the script deals with parsing responses. Unfortunately, the API for accessing form data doesn’t allow you to consistently apply labels or identifiers to parts of the form, so I fall back on string parsing and formatting for this. The script itself builds a representation of the questions of the form and how to parse the response data, which is configured in this block:
var QUESTION_MAP = [
  {
    // This question determines who the email is sent to.
    // Configured to match a multiple choice input:
    //   Audience of the change?
    //   - Developer facing
    //   - User facing
    //   - Internal only change
    startsWith: 'AUDIENCE',
    key: 'audience',
    responseMap: [
      {
        startsWith: 'DEVELOPER',
        key: 'developer-facing',
        emails: [ ALL_EMAIL_ALIAS, VISIBLE_EMAIL_ALIAS ],
        bcc: [ SLACK_EMAIL_ALIAS ],
      },
      {
        startsWith: 'USER',
        key: 'user-facing',
        emails: [ ALL_EMAIL_ALIAS, VISIBLE_EMAIL_ALIAS ],
        bcc: [ SLACK_EMAIL_ALIAS ],
      },
      {
        startsWith: 'INTERNAL',
        key: 'team-only',
        emails: [ ALL_EMAIL_ALIAS ],
        bcc: [ SLACK_EMAIL_ALIAS ],
      },
    ],
  },

  {
    // This question adds extra data to the email.
    // Configured to match a multiple choice input:
    //   Timeline of the change?
    //   - Live
    //   - Imminent
    //   - Soon
    //   - Testing
    //   - Later
    startsWith: 'TIMELINE',
    key: 'timeline',
    responseMap: [
      {
        startsWith: 'LIVE',
        key: 'shipped',
      },
      {
        startsWith: 'IMMINENT',
        key: 'shipping',
      },
      {
        startsWith: 'SOON',
        key: 'soon',
      },
      {
        startsWith: 'TESTING',
        key: 'beta',
      },
      {
        startsWith: 'LATER',
        key: 'design',
      },
    ],
  },

  {
    // This question defines a one-line summary of the change.
    // The summary is transformed to have punctuation at the end.
    startsWith: 'SUMMARY',
    key: 'summary',
    responseTransform: makeSentence,
  },

  {
    // This question defines a multi-line description of the change.
    // No transformation of the input is done.
    startsWith: 'DESCRIPTION',
    key: 'description',
  },
];
This is an array of entries which will be matched against individual questions for each response. The configuration says how to map or transform the response data into the Javascript object which is passed to template methods. First match wins.
At its simplest, a question simply puts template data into the output object under a specific key. For example:
{
  // This question defines a multi-line description of the change.
  // No transformation of the input is done.
  startsWith: 'DESCRIPTION',
  key: 'description',
}
This will match a question which starts with the word “Description” (case-insensitive matching is used). A submission where the answer to that question is “Klaatu barada nikto” will produce the following keys in the output map:
{
  ...
  description: "Klaatu barada nikto",
  description_raw: "Klaatu barada nikto"
  ...
}
The exact submitted text is available under description_raw. If the text is
modified in any way, it is stored under description. In this case both are
identical. For an example of a transform, I wanted to make sure summary text
always ends in punctuation by calling a makeSentence function on all input.
This function returns a string which always ends in punctuation. The “Summary”
question adds a responseTransform parameter which calls the supplied function
on input text:
{
  // This question defines a one-line summary of the change.
  // The summary is transformed to have punctuation at the end.
  startsWith: 'SUMMARY',
  key: 'summary',
  responseTransform: makeSentence,
}
This will generate the following in the output object (note the period at the
end of summary):
{
  ...
  summary: "Klaatu barada nikto.",
  summary_raw: "Klaatu barada nikto"
  ...
}
To handle multiple choice values, the script can match response text and add additional values as a subobject to the output. For example, this is how the timeline question is written:
- Timeline of the change?
- Live (reporting retroactively)
- Imminent (turning on today)
- Soon (turning on in the next few days)
- Testing (our first beta user was signed up)
- Later (planning stage, looking for feedback)
The configuration which matches this is:
{
  startsWith: 'TIMELINE',
  key: 'timeline',
  responseMap: [
    {
      startsWith: 'LIVE',
      key: 'shipped',
    },
    {
      startsWith: 'IMMINENT',
      key: 'shipping',
    },
    {
      startsWith: 'SOON',
      key: 'soon',
    },
    {
      startsWith: 'TESTING',
      key: 'beta',
    },
    {
      startsWith: 'LATER',
      key: 'design',
    },
  ],
}
A form submission selecting “Imminent (turning on today)” for this question would produce the following output:
{
  ...
  timeline: {
    startsWith: 'IMMINENT',
    key: 'shipping',
  },
  timeline_raw: "Imminent (turning on today)",
  ...
}
The script uses the same responseMap config for the “Audience of the change?”
question, but puts different data into the output object. For example:
{
  startsWith: 'DEVELOPER',
  key: 'developer-facing',
  emails: [ ALL_EMAIL_ALIAS, VISIBLE_EMAIL_ALIAS ],
  bcc: [ SLACK_EMAIL_ALIAS ],
}
Produces the following output:
{
  ...
   audience: {
     startsWith: 'DEVELOPER',
    key: 'developer-facing',
    emails: [ ALL_EMAIL_ALIAS, VISIBLE_EMAIL_ALIAS ],
    bcc: [ SLACK_EMAIL_ALIAS ],
  },
  ...
}
I’ll note that the format of this data has no semantic meaning. So “emails”,
“bcc”, etc don’t mean anything other than being unique labels in the output
data. But the various generateFoo methods used to build the email data know
where to look:
function generateRecipient(data) {
  var emails = data['audience']['emails'] || [];
  return emails.concat(data['submitter']).join(',');
};
In this case, the list of email recipients is generated by concatenating the
audience.emails key with the submitter key which is automatically set when
you configure the form to collect submitter emails.
The other big templating function is the one which generates the HTML email body:
function generateHtmlBody(data) {
  return Utilities.formatString(
    [
      '<b>Submitted by</b> %s',
      '<b>Audience</b> %s',
      '<b>Timeline</b> %s',
      '',
      '%s',
      '',
      '%s',
      '',
      '<i>This change log was submitted via <a href="%s">this form</a>.</i>',
      '',
    ].join('<br>'),
    data['submitter'],
    data['audience_raw'],
    data['timeline_raw'],
    data['summary'],
    data['description'].split('\n').join('<br>'), // Convert newlines to HTML line breaks.
    FORM_URL);
};
Here, the output object of parsing the form response is passed to
Utilities.formatString, another Apps Script standard library
method. It works like sprintf in C and is handy for
simple templating methods.
Hopefully that’s enough overview to help you understand how the script operates and how you might be able to configure or modify it for other purposes in the future. There are a lot of other things you can do with Apps Script which make it super useful to make custom tools for your workflows. I’m happy to talk through more thoughts along these lines - please reach out on Twitter if you want to talk through some more!
Comments? If you have feedback, please share it with me on Twitter!